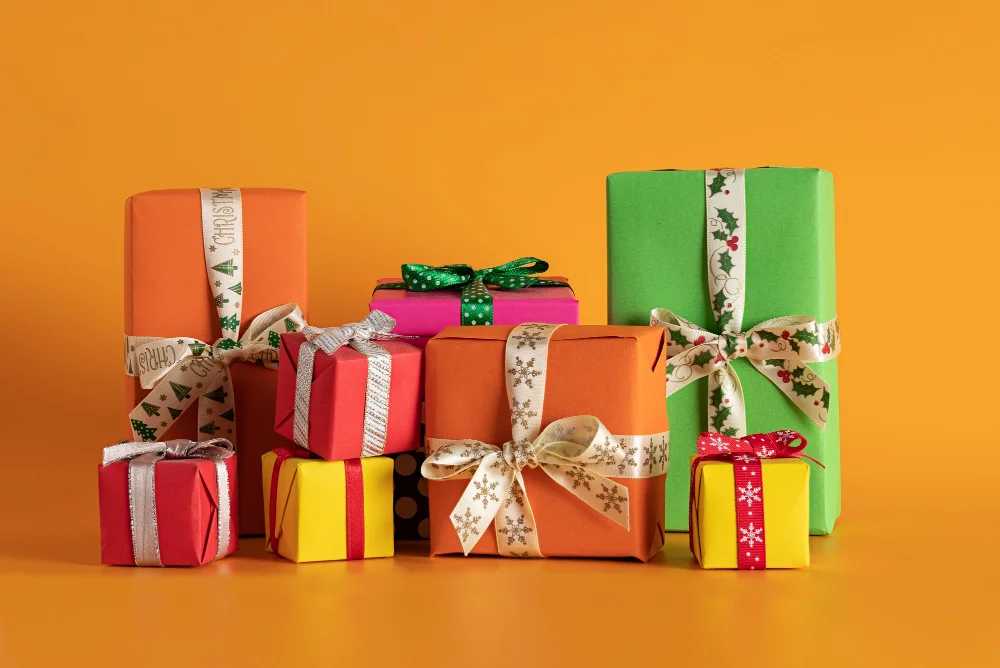
Why does gift wrapping look effortless in someone else’s hands, yet turn into crumpled corners and visible tape the second you try it yourself? That question is usually the real search intent behind how to wrap gifts. People are not looking for a history lesson on wrapping paper. They want a method that works, looks neat, and does not leave the present resembling a GCSE craft project gone wrong.
After testing the usual techniques on everything from books and candles to bottles and soft jumpers, one thing became obvious: beautiful wrapping is far less about expensive paper and far more about control. The strongest guides ranking for this topic focus on the basics—measuring properly, wrapping a box first, folding clean ends, and dealing with awkward shapes. That is exactly where most people go wrong, and it is exactly where this guide is more useful.
You will learn how to wrap a standard gift neatly, what to do with strange shapes, how to make the present look more polished, and how to do it with less waste. So whether you are wrapping a birthday gift, a wedding present or a Christmas parcel at the eleventh hour, this is the version that makes sense in real life.
What you need before you start
You do not need a drawer full of specialist supplies. A neat gift can be wrapped beautifully with just a few basics.
Essential tools
- Wrapping paper or reusable fabric
- Sharp scissors
- Clear tape or double-sided tape
- Ribbon or twine
- Gift tag or small card
A number of leading wrapping tutorials stress the same point: sharp scissors and a flat surface matter more than fancy accessories, because clean cuts and firm creases are what make wrapping look tidy. Hallmark and Scotch both emphasise proper setup and clean edges as part of a neat finish.
One small preparation trick that saves time
Before you start, tear or cut a few small pieces of tape and stick them to the edge of the table. It sounds minor, but it stops that annoying one-handed scramble when you are trying to hold the paper in place and reach for the tape dispenser at the same time.
The easiest way to wrap a gift properly
If your present is not in a box, put it in one if possible. That single decision makes wrapping dramatically easier. Most of the top-ranking guides perform well because they start with the box method first—it is the simplest, most reliable answer to the user’s problem.
Step 1: Measure the paper instead of guessing
Lay the wrapping paper face down. Place the gift box upside down on the paper, because the final seam should sit underneath the present, not on top. Hallmark’s guide recommends placing the box top-down and aligning it carefully, especially if the reverse side of the paper has a grid.
Now roll the box once across the width of the paper to check how much paper you actually need. You want enough to cover the box with a modest overlap in the centre, not a huge surplus.
This is where many people sabotage the whole result. Too much paper creates thick, bulky folds at the ends. Too little paper forces you into awkward stretching. In my experience, most beginners overcut, then spend the rest of the job fighting unnecessary paper.
Step 2: Cut neatly and fold one edge under
Once the paper is measured, cut it in a straight line. Then take one long edge and fold a slim strip inward before bringing it across the box. This hides the rough cut and gives the centre seam a cleaner finish.
That tiny fold makes a striking difference. It is one of those details that turns a home-wrapped present into something that actually looks intentional.
Step 3: Secure the centre seam underneath
Bring one side of the paper over the box and tape it down. Pull the opposite side over it, keeping the paper taut but not stretched, and secure it underneath the box.
Professional and brand-led gift-wrapping guides consistently rank well because they solve this exact pain point: they show readers how to position the seam underneath and keep the wrap snug rather than loose. Scotch, Hallmark and Vistaprint all emphasise measuring well, wrapping smoothly, and creating clean flaps on the shorter ends.
Step 4: Fold the ends like an envelope
At one open end, push the top flap down towards the box so the paper naturally forms two triangular wings on either side. Crease those edges firmly with your fingers.
Then:
- Fold one triangle inward
- Fold the other triangle inward
- Lift the bottom flap up
- Fold the top flap down
- Tape neatly
Repeat on the other side.
The secret is not speed. It is pressure. A good crease will do more for the final result than another strip of tape ever will.
How to wrap gifts without ugly corners
Corners are usually what give the game away. If they look clumsy, the whole parcel looks messy.
Keep the paper tight
Loose paper creates puffed ends and sagging seams. The paper should lie close to the box without bunching. One reason professionally wrapped gifts look crisp is that the paper is guided into shape rather than left floating.
Reduce the paper before folding
If the paper extends too far at the ends, trim it. You do not need giant flaps. Smaller, well-fitted flaps create flatter corners and a smarter finish.
Crease before taping
Do not use tape to force the paper into shape. Fold first, press the edges firmly, then tape. That order matters more than people realise.
How to wrap awkwardly shaped gifts
This is where most wrapping guides become repetitive. They tell you to “just use a gift bag” and move on. Sometimes that is sensible, but not always.
Soft gifts like clothes or scarves
If you are wrapping a jumper, hoodie or pyjamas, the cleanest move is to fold the item and place it inside a shirt box or spare cardboard box first. If you wrap soft clothing directly in paper, the gift often ends up looking lumpy and unstable.
I learnt this after trying to wrap a cardigan on its own. No matter how carefully I folded it, the parcel looked like it had given up halfway through. Once boxed, it took two minutes and looked ten times better.
Bottles and candles
Cylindrical items are awkward with standard paper because the ends bunch. Recent design and home styling pieces increasingly recommend fabric wrapping for these shapes, especially for bottles. Architectural Digest’s current guide highlights fabric wrapping for a polished finish, while newer furoshiki-style tutorials continue to gain attention for exactly this reason.
For a bottle, two good options work well:
The paper wrap method
Wrap the body as usual, then twist and tie the top with ribbon
The fabric wrap method
Place the bottle in the centre of a square cloth and tie opposite corners into knots
The fabric version usually looks more elegant, and it avoids that scrunched paper neck that so often makes bottles look awkward.
Large or oddly shaped presents
If the item is oversized or impossible to square off, a gift bag, reusable sack, or fabric wrap is often the smartest answer. Modern wrapping content that performs well increasingly includes alternatives to traditional paper because readers want solutions, not perfectionism.
The most elegant low-waste way to wrap gifts
One of the newer angles missing from many old gift-wrap articles is sustainability that still looks stylish. Readers no longer want to choose between “pretty” and “responsible”.
Try furoshiki for reusable wrapping
Furoshiki is the Japanese practice of wrapping items in cloth. It has become more prominent in newer high-performing content because it solves several modern concerns at once: it looks chic, suits odd shapes, and creates less waste. Recent articles from design and craft publishers highlight furoshiki as both practical and beautiful, and the Japanese Ministry of the Environment promotes it as a reusable wrapping method.
How to do a simple fabric wrap
- Lay a square cloth in a diamond shape
- Place the gift in the middle, slightly angled
- Bring left and right corners together and knot
- Bring top and bottom corners together and knot again
Quilters Candy notes a useful rule of thumb: choose a piece of fabric roughly three times larger than the item you are wrapping.
The best part is that the wrapping becomes part of the gift. A scarf, bandana, tea towel or soft cotton square can all work beautifully.
How to make your gifts look more expensive
You do not need luxury paper to achieve a high-end look. Some of the most elegant wrapped gifts are also the simplest.
Use plain paper with one standout detail
Brown kraft paper, ivory paper or a solid colour wrap looks more refined than a loud seasonal print when finished well. Add black ribbon, velvet ribbon, twine, dried orange, rosemary, eucalyptus or a handwritten tag.
The result feels considered without trying too hard.
Hide the tape
Visible tape is one of the quickest ways to make wrapping look rushed. Double-sided tape helps if you have it, but if not, simply using fewer, smaller pieces of clear tape already improves the finish.
Match the wrap to the person
This sounds obvious, but it is what makes a gift feel personal. Use soft linen ribbon for someone who likes understated style. Use comic-themed tags for a child. Use reusable fabric for someone who loves practical gifts. Presentation should echo the person, not just the season.
Read Also: What Gifts Do You Give Someone in a Long-Distance Relationship?
Common gift-wrapping mistakes people still make
Using too much paper
More paper does not mean better coverage. It usually means bulkier folds and more frustration.
Wrapping directly on a soft surface
Beds and sofas shift under pressure. A table gives you the stability needed for straight folds.
Choosing shiny, slippery paper as a beginner
Glossy paper looks lovely on the roll but can slip around and show every crease. Thicker matte paper is usually more forgiving.
Adding too many decorations
A bow, a ribbon and a tag can work. A bow, ribbon, tag, bells, glitter star and fake holly usually looks overdone.
Quick gift-wrapping ideas when you are short on time
Sometimes you need the present wrapped in five minutes and all the perfect-fold advice in the world is not helping.
The foolproof fast method
Use a box, cut the paper accurately, create one neat centre seam, fold the ends simply, and finish with ribbon
The stylish emergency option
Use plain tissue paper in a gift bag, add one folded sheet sticking out neatly at the top, and attach a proper tag
The smart reusable option
Wrap the item in a scarf, tea towel or fabric square and tie a knot
That last one has saved me more than once, and it nearly always gets compliments because it looks far more deliberate than frantic last-minute paper wrapping.
Actionable tips that instantly improve your wrapping
If you only remember five things from this article, make them these:
1. Box awkward items first
It saves time and creates cleaner lines
2. Cut less paper than you think you need
Too much paper causes more problems than too little
3. Fold one raw edge under
This gives the seam a finished look
4. Crease every fold firmly before taping
Sharp folds matter more than extra tape
5. Use one finishing detail, not ten
Simple almost always looks more polished
Read Also: 10+ Gifts for a Woman Who Has Everything
FAQs
What is the easiest way to wrap a gift?
The easiest way is to place the item in a box, measure the paper so it slightly overlaps, wrap the seam underneath, and fold the ends into neat triangular flaps. This remains the most widely recommended method in leading gift-wrapping guides.
How do you wrap gifts without tape showing?
Fold one cut edge inward before making the final seam, use small pieces of tape placed underneath or on hidden joins, and keep the main seam on the underside of the gift.
How do you wrap oddly shaped gifts?
Box them first if possible. If not, use a gift bag, cellophane, or fabric wrapping. Fabric methods are especially effective for bottles and rounded items.
Is fabric gift wrapping better than paper?
It can be, especially for awkward shapes and for reducing waste. Furoshiki-style cloth wrapping is reusable, visually distinctive, and increasingly recommended in newer wrapping guides.
How much wrapping paper do I need?
You need enough paper to cover the gift with a slight overlap in the middle and manageable flaps at each end. Measuring with the box on the paper before cutting is the most reliable method.
Final thoughts
The best gift wrapping does not scream for attention. It quietly tells the recipient that you cared enough to slow down, line things up, and finish the job properly. That is why good wrapping feels special even before the present is opened.
If you want the quickest improvement, start with one boxed gift and practise the basic fold-and-crease method. Then try a reusable fabric wrap for a bottle or an awkwardly shaped item. Once you understand how paper or fabric wants to move around an object, wrapping stops feeling like a chore and starts feeling surprisingly satisfying.
And honestly, that is the real secret. Not more tape. Not fancier ribbon. Just better technique.
How do you usually wrap gifts—classic paper, gift bags, or reusable fabric? Share your go-to method or your biggest wrapping disaster. Those are usually where the best tips come from.